
To get started with any project using the Clarifai platform, you'll need to create an application. An application is literally what it sounds like: an application of AI to an existing challenge. It’s a self-contained project for storing and handling, data, annotations, models, concepts, datasets, workflows (chaining of models together), and searches.
An operation performed in one application will return results from data within that application, but will be blind to data in other applications. You can create as many applications as you like and can divide your use among them to segment data into collections and manage access accordingly. Usually, you would create a new application for each new set of related tasks you want to accomplish.
Using your application, you can then make calls to it with out API to create whatever product or use case you need. Applications can be created using our online Portal, through the API, and now through our Python SDK as well, which simplifies the process programmatically.
Here we'll show you how to create an app, upload data and annotation, divide them into datasets, and make predictions. Let's take a look!
Install Clarifai Python SDK using the below command:
Get started by retrieving the PAT token from the instructions here and setting up the PAT token as an environment variable. Signup here
Applications are the basic building blocks for creating projects on the Clarifai platform. Your data, annotations, models, workflows, predictions, and searches are contained within applications. You can create as many applications as you want and edit or delete them as you see fit.
Building AI Apps using our Python SDK can be easy. Let's consider some scenarios of Apps or the usage of SDK.
Let's walk through the steps.
Ingesting data for quickly building your AI Apps can be done with fewer lines of code.
Below is an example of how to label a new rectangular bounding box for a region.
The bounding box normalized to the data dimension to be within [0-1.0]
An example of how to provide annotations within any polygon-shaped region of an image.
These are the list of points that connect together to form a polygon:
An example to uploading a sample text with its labels as “mobile” and “camera”
The SDK offers a wide range of capabilities for efficiently importing data from local directories or CSV files into a Clarifai Dataset. You can explore an illustrative notebook demonstrating the data ingestion process in the dataset upload notebook.
Numerous instances of uploading datasets encompassing various types, including visual classification, detection, segmentation, and text classification, can be found within our examples repository. These examples cover a wide range of datasets, including Cifar10, PascalVOC, COCO, IMDB reviews, and more.
For more information on using the platform from a vast array of enlisted Models across Computer Vision and NLP, read more here.
We are working towards adding Model training interfaces within the SDK as well and we will be releasing the same in the coming months.
You have the option to employ the Clarifai UI for model training. Within the platform, you can design your custom model and subsequently generate predictions with it. Simply click on the "Create Model" button located in the top-right corner of the page.

Next, choose the type of model you want to create.
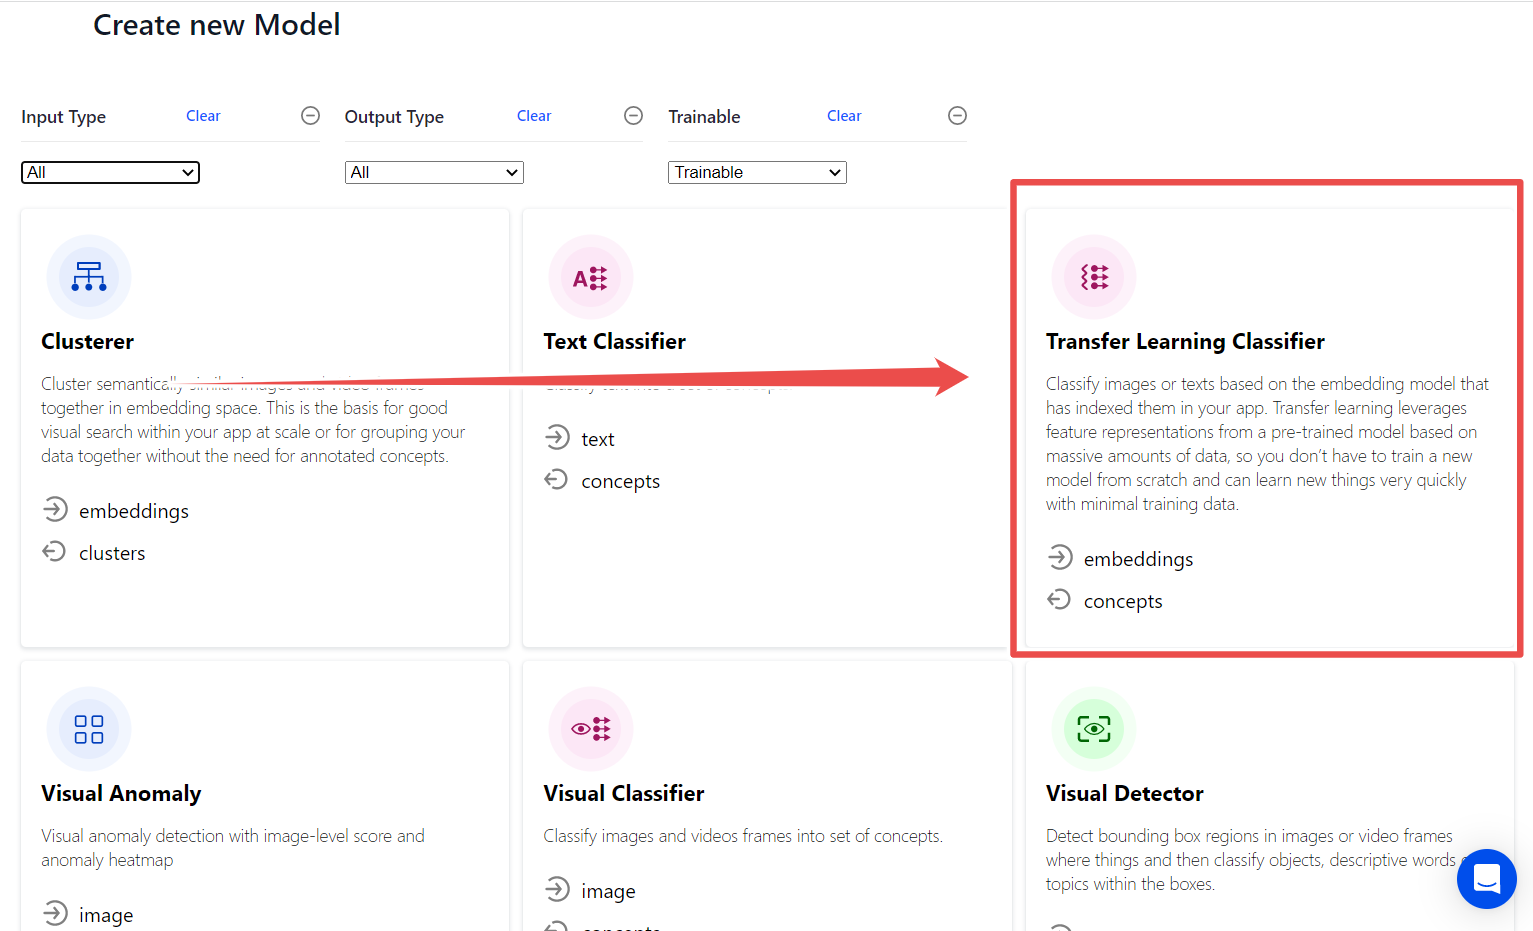
You can refine your results by:
In this example, we will opt for a Transfer Learning Classifier.
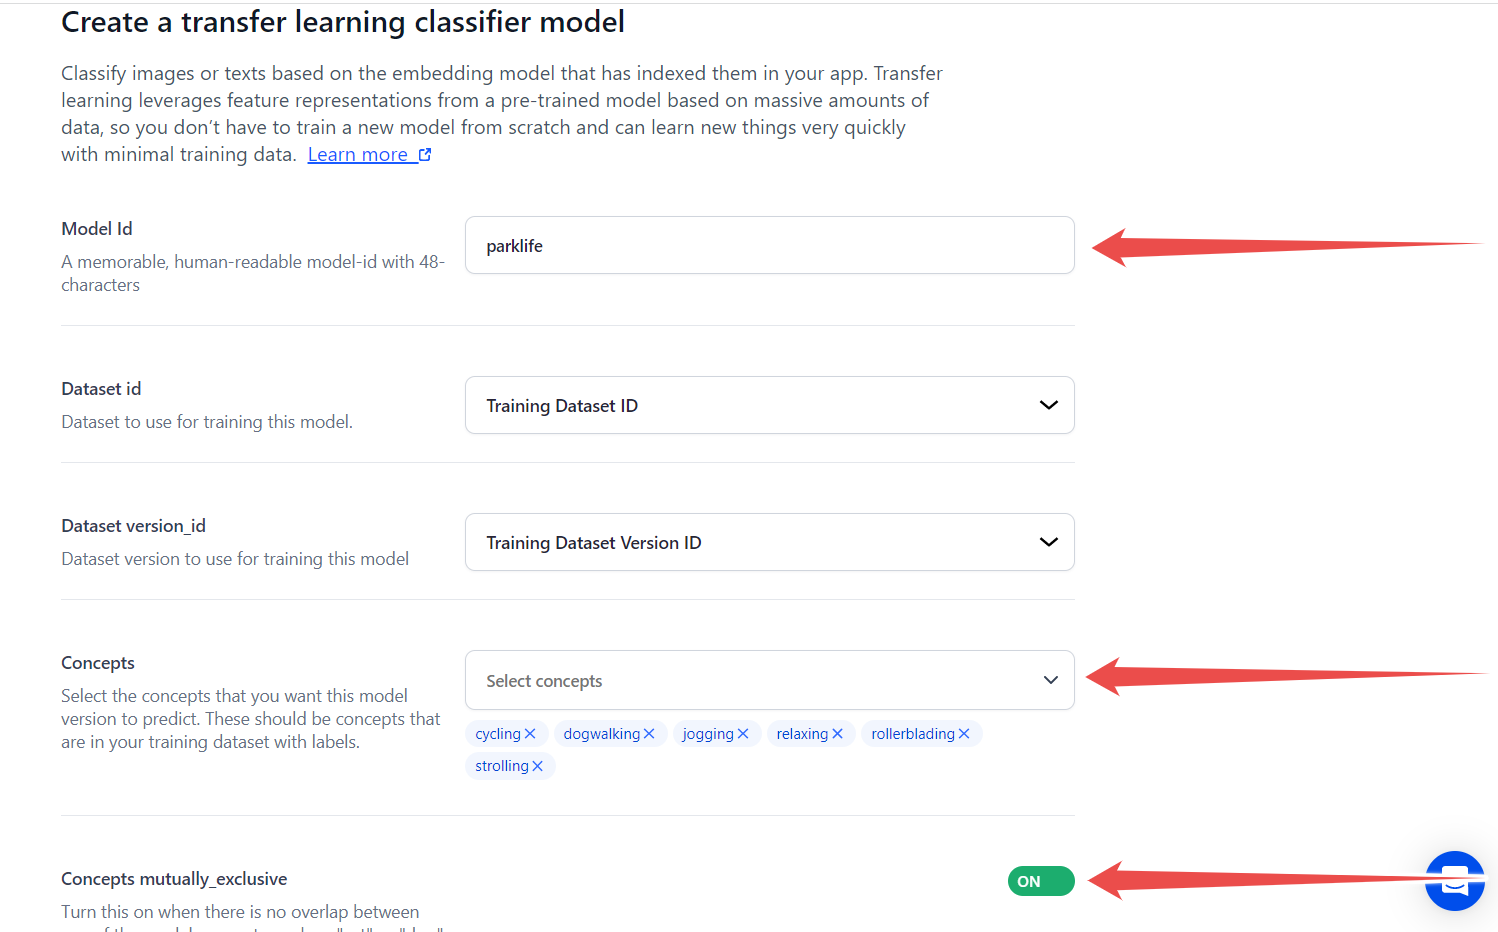
Once you have configured the model, proceed by clicking the "Create Model" button located at the bottom of the page.
Then, on the specific model's page, simply click the "Train Model" button situated in the upper right-hand corner of the page.

Your model will be trained on all inputs that have been processed. If you're training the model again, a new version of the model will be created.
Explore Community models here.
Below is an example of how you would send an image URL and receive predictions from Clarifai's general-image-recognition model.
The Model Predict notebook includes a collection of diverse examples covering different input types, such as images, videos, audio, and text. The notebook also guides on selecting prediction parameters and model versions.
We are bringing more data utilities for converting annotation formats before uploading or exporting, text splitting, model training and evaluation interfaces, and vector search interfaces.
Also, let us know what functionality you would like to see in the SDK in our discord channel.
For more information on Python SDK, refer to our Docs here and for detailed examples, we constantly strive to add more notebooks here.



© 2026 Clarifai, Inc. Terms of Service Content TakedownPrivacy Policy