Learn how to implement image classification for e-commerce apps in a few steps. Thanks to Nick Engmann for this Clarifai feature tutorial!
Computers are doing just about everything these days, from powering backflipping robots to emulating the human voice. Given these technological advances, it should not surprise us that image recognition APIs can tell the minute differences between a ‘Pink Lady’ and a ‘Red Delicious’ apple. By leveraging the power of Clarifai’s image classification tools you can train your apps to recognize just about anything. Welcome to the world of super-powered computer vision hacks!
Clarifai has already trained its general image recognition model to classify over 11,000 concepts including streets, vehicles, and foliage. However, using the power of Clarifai’s Custom Training platform users can create their own custom models and concepts.
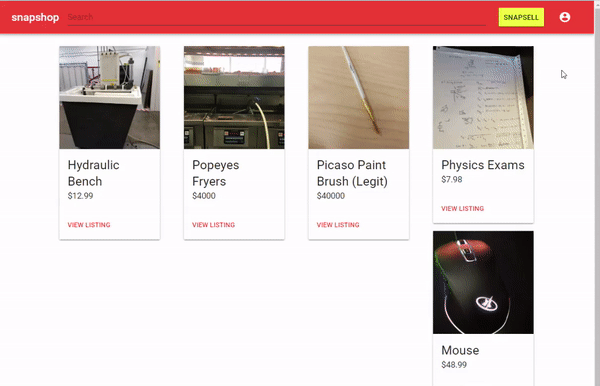
Recently, a team at HackMerced demoed their winning application SnapShop, leveraging the power of Clarifai’s general image classification model. Their application allows users to upload items to a virtual storefront and automatically have items labeled with the topics Clarifai finds.
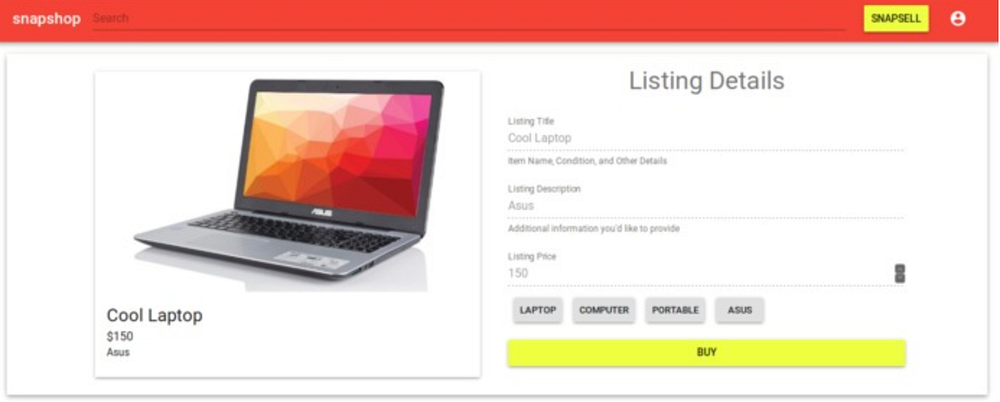
We loved their application but noticed that the tags that come back from the general model are, as expected, general. We wanted to use Clarifai’s Custom Training platform to see if we could make the results more robust. Our goal is to let users upload laptops and have the Custom Training platform label with its brand.
Sign up for your free Clarifai account here!
Getting Started with SnapShop’s Code
For this tutorial, we are going to build on top of SnapShop’s codebase but change it so that we can identify specific laptops by using Clarifai’s Custom Training platform. So first let's go ahead and download both SnapShop’s GitLab backend repo and frontend repo. You can follow their readmes for details on how to deploy the application.
Setting Up the Frontend
Setting Up the Backend
Setting up Clarifai
Next, we’ll need to set up a Clarifai account. You can follow the direction here to create a new application. Select ‘General’ as your basic workflow and type ‘laptops’ as your App name.
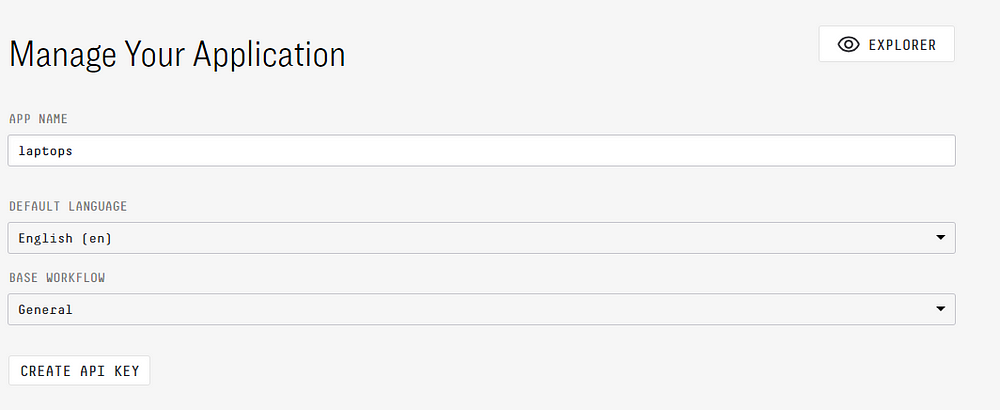
Next, you’ll want to click on ‘API Keys’. You’ll find your information in the dropdown below. Make sure to take down your API Key, and don’t share this string with anyone else! It will be used to verify that you’re the developer accessing the API.
Add Your Details to SnapShop’s Code
First, we’ll need to fill in our Clarifai API credentials in Snapshop’s backend code. Take the API key that you copied from the Clarifai application and paste it over the YOUR_API_KEY placeholder inside the tags.py file.
Filepath: hackmerced-shop-server/tags.py
Change the frontend Sell.js file to point at your local backend:
Filepath:hackmerced-shop-client/src/components/routes/Sell.js
Let’s Test Things Out!
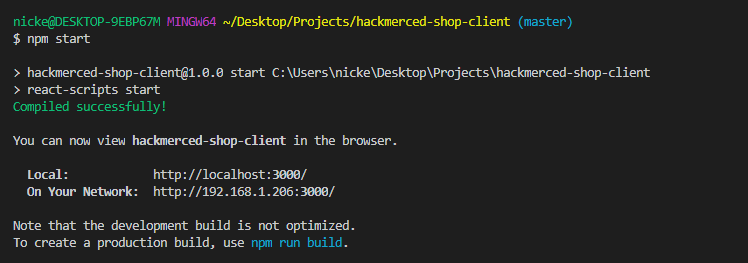
Now that our own credentials are in place, we can run SnapShop’s code locally.
On the client side run:
$ npm start
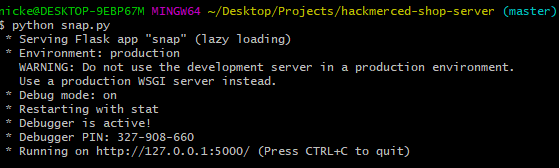
On the server side run:
$ python snap.py
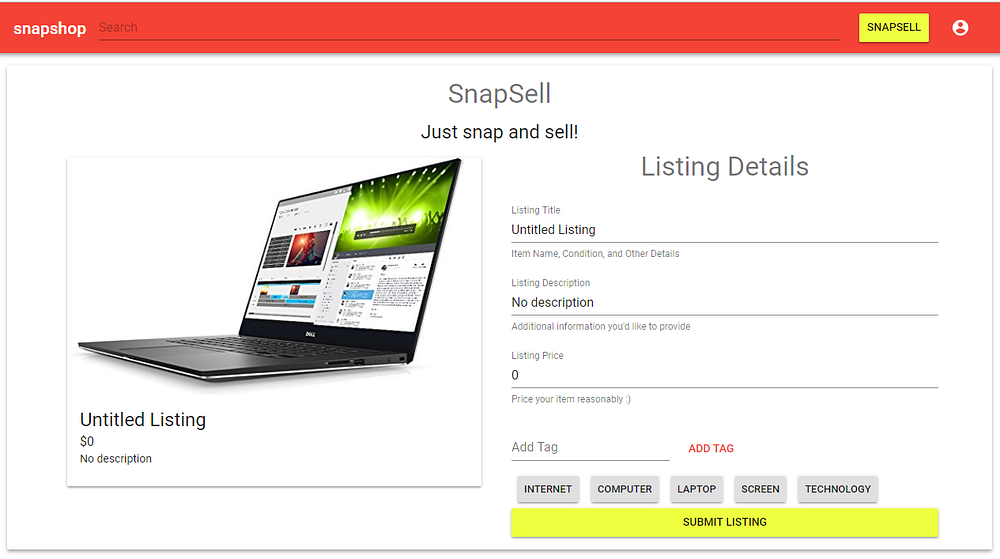
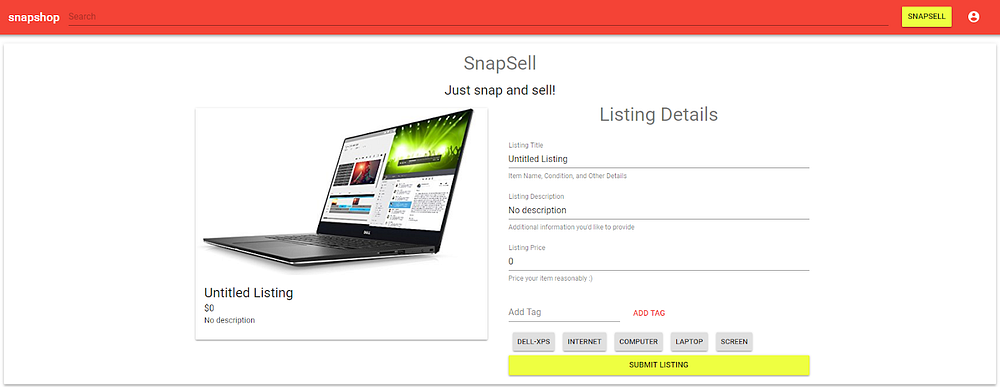
Let’s take a picture of a Dell-XPS and upload it to SnapShop.
Not too shabby! The general Clarifai model classified the Dell-XPS image we gave it as “Internet”, “Computer”, “Laptop”, “Screen”, and “Technology”. Now it’s time to leverage the power of Clarifai’s Custom Training model to see if we can get SnapShop to classify this same image as a Dell-XPS.
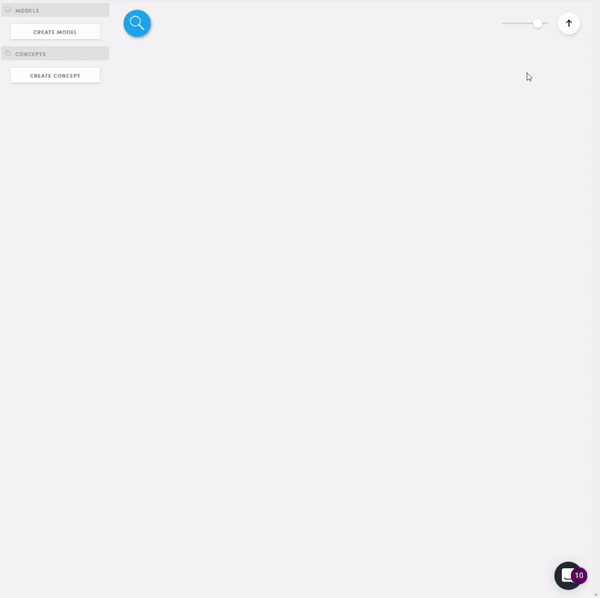
Add Images to Your Clarifai Application
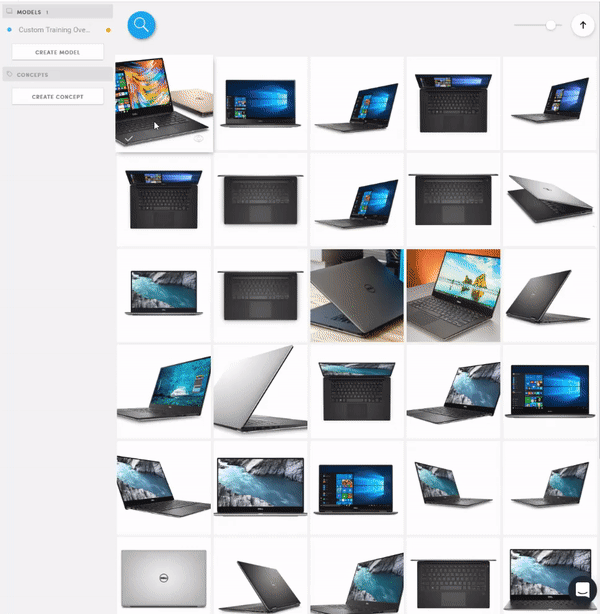
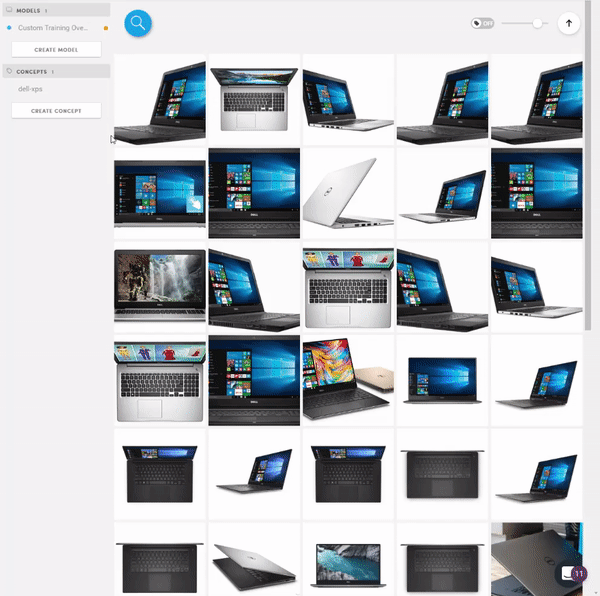
Custom models are built by training on your own data. To help our application identify our custom concepts let’s upload pictures of the concept we want it to recognize. You can either upload image files to your Clarifai application or you can drag and drop image URLs to the application.
Here is a handy Github gist for you that has a list of images of a Dell-XPS, not including our previous test image. Let’s copy and paste these links in!
Adding a Concept
Now that the images are inside the web application we need to tell Clarifai what they are. In the browse screen, we can select these recently uploaded images and hit the add concept button and give these images the label “dell-xps”.
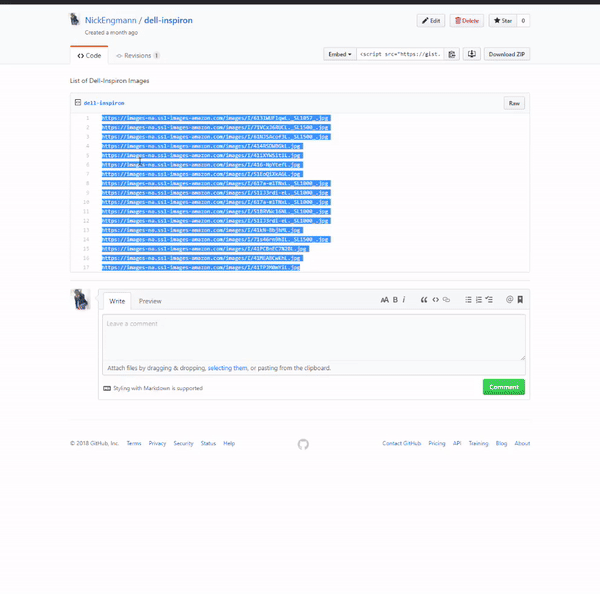
Adding Negative Concepts
To make a robust concept it’s important to tell our model what is NOT a Dell-XPS as well. Luckily this is a super simple process! To start, go ahead and copy the links from this gist of examples of Dell-Inspirons. And just like before we are going to add these image URLs to Clarifai.
Finally, similar to the positive examples, highlight the negative examples and hit add concept. This time, though, we double-click the dell-xps concept to show the cancel icon.
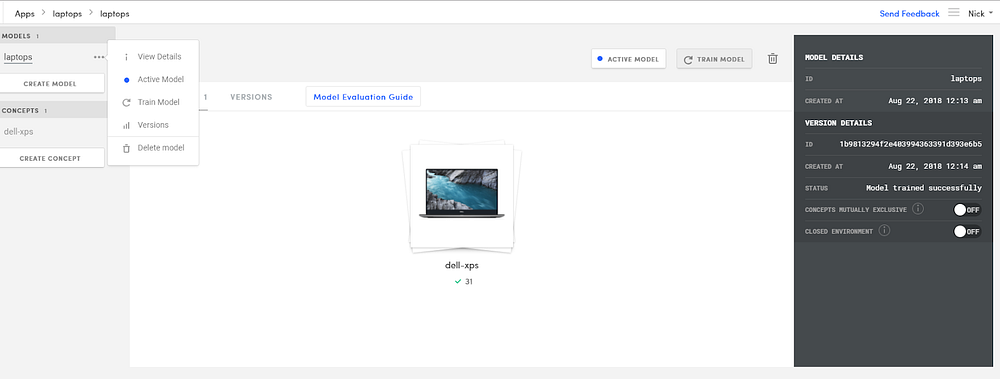
Training Our Model Based on Our Photos
Now you are a few clicks away from properly training the model. Go ahead and click on the ellipses icon beside the ‘laptops’ model and click ‘Train Model.’ You will know when training is finished by the dialog on the far right screen displaying “Model trained successfully.”
Pulling it all together!
Next let’s configure the backend to use both the general model you were using before and this new custom laptops model we are developing. Copy the code below and replace your tags.py file in your SnapShop backend. Remember to include your API key!
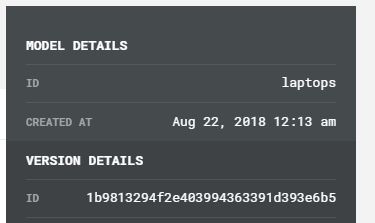
Go ahead and paste in your API key on lines 5 and 9. Then you have to add your model version id in on line 17. This way the model knows which version to use during the backend call. You can find this model version id on the models page on the right side.
Testing
Time to test things out! Go ahead and fire up the backend and the frontend. Then upload the picture of the Dell-XPS laptop used before and boom-bam-pow specific image characterization.
Now that you know how to use Clarifai’s custom training platform, you can add more images and concepts to your model to make it even more versatile. Check out Clarifai’s Custom Training Overview for a guide on how to further expand your image classification applications!